Recently I promised to write about our second mini project for graphics so, here we go!!
Our starting point was the same as the week before: Shipping forecast for a random shipping location. This time however we were asked to experiment with whatever methods we want to create our designs and so our creativity wasn’t limited to a computer design. Yep, I know it sounds Exciting!
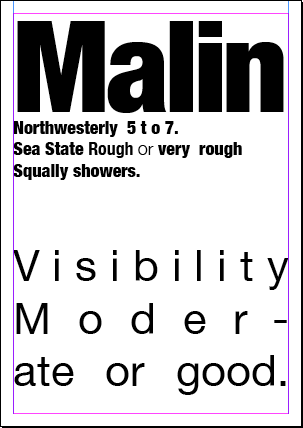 The shipping forecast for Malin:
Wind: northwesterly 5 to 7.
Sea State: rough or very rough.
Weather: squally showers.
Visibility: moderate or good.
At first I wanted to design a poster using InDesign and then work on it with pen but when I created the first design on computer I decided to change my strategy and be more experimental. So, on the right you can see the first design that I created that day, before I decided to change my way of working:
In my next designs I decided to use only a part of the shipping forecast rather than the whole text and I ended up with a short: “Malin squally showers” I then begun to think about how I can arrange the letters to make them visually express their meaning. I still decided to use InDesign to create the initial arrangement of the text. I then experimented with different methods and here are some examples of what I created:
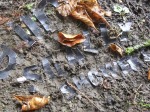
I also used one spare copy of my design and cut out the letters to create a stencil. I didn’t like the effect that much but I decided to do some further experimentation using the letters I cut out. As it was raining at the time a had a perfect opportunity to use a wet ground as the background for my letters and I think I managed to create some interesting designs.

So here is the design created using stencil (the one that didn’t work too well)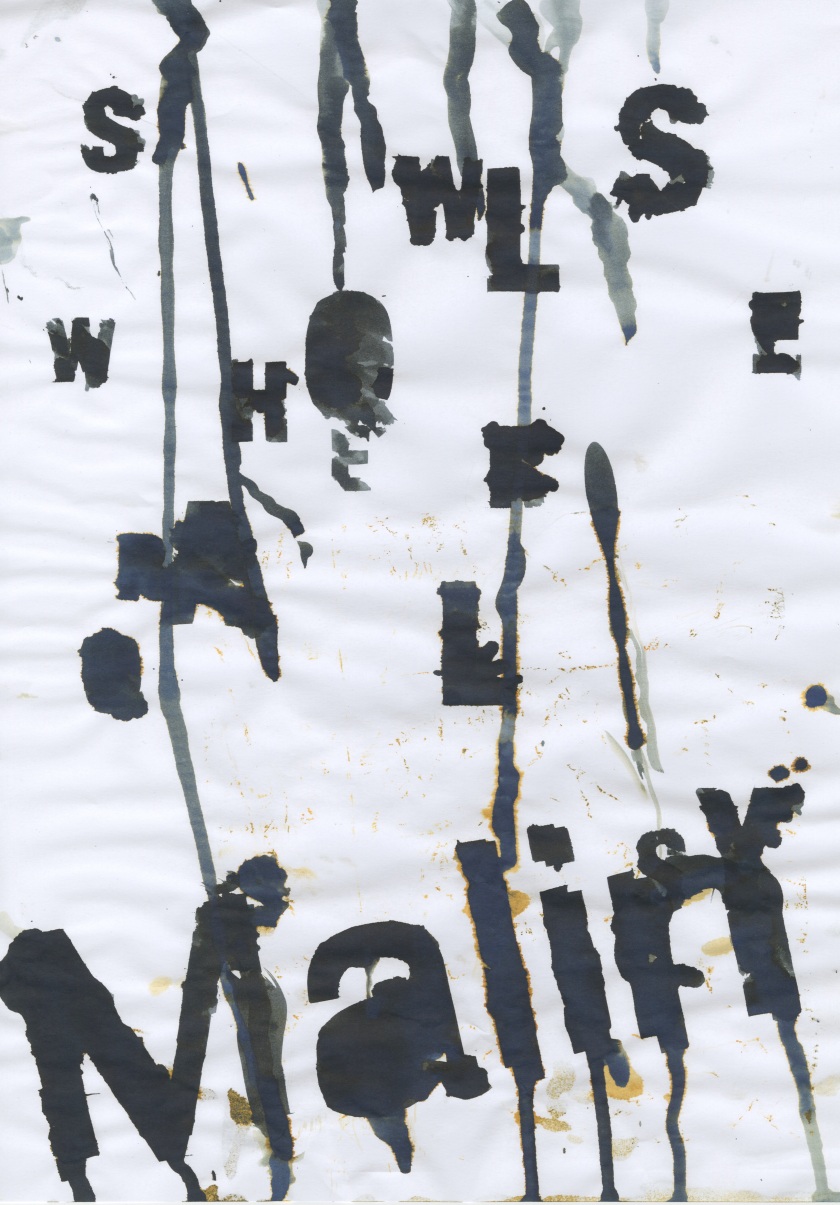
..and these are the photographs I took outside:
I know, they look awesome!..but putting them on the wet ground was a disaster as they kept rolling up! Before I managed to do anything I ended up with a pile of letters that looked pretty much like that: ..it probably wouldn’t be that bad if not the fact that it was raining, my umbrella was heavy, my camera was running out of battery..and I also had to keep it clean and dry which was really difficult since my hands were covered in mud…uff
Oh yes! While I was putting the letters on the ground, another of my ideas was getting wet on the road (purposely of course). While I was still in the classroom I quickly painted one of the spare copies of the design with the quink ink as I was curious what effect I can achieve if I put it outside, on the muddy road on this rainy day. And hey! I did it purely out of curiosity but it turned out to work quite well!..And I also have one of the works that I created by accident when I crumbled a spare wet copy of my design..which was also covered in mud as I kept my letters on it after I used them!.. I know I shouldn’t make this post any longer..but just have a look okay!
So, that’s it for now! I hoped you liked it and look forward to my next post!:)


You must be logged in to post a comment.